Editing tips using the BeatForm Sequencer
Probably the most fun we have when using any music production software is finding neat workflow options that surprise you and help you achieve interesting results. By now you may be aware that Liquid Rhythm is not your average music production software. It is literally jammed with cool tricks and fun ways to mangle your musical ideas. In this tutorial we focus on a few simple clicks that can have some powerful results.
The focus of the workflow deals with altering groups of beatforms as they sit on the barforms by using the beatform sequencer and shift keys. The video covers a more detailed collection of choices, but for now lets just see that happens when we use the Shift key and click around in fun places.
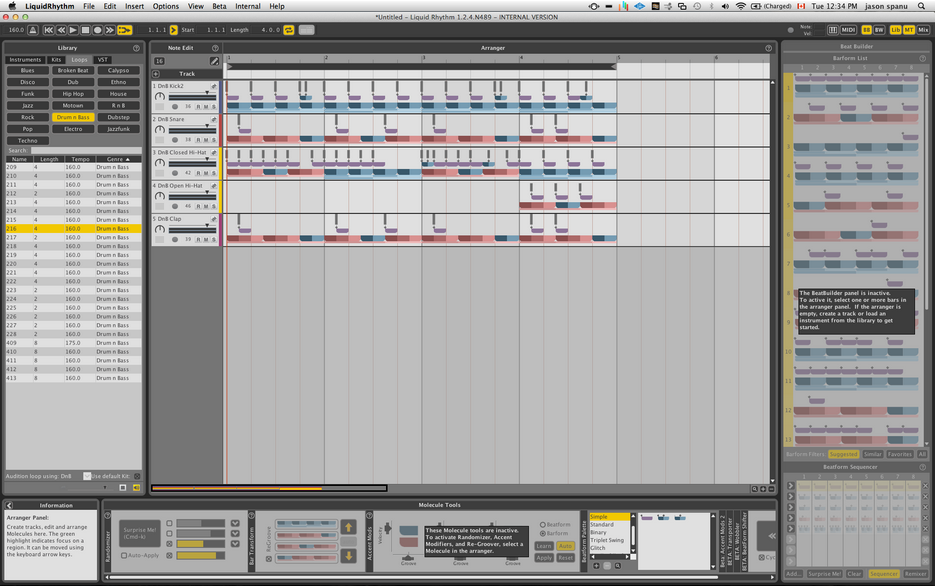
So we start with an existing loop or Rhythm.

Lets Play around with the hi hats.

Select all the notes across a few bars. Note that the selected barforms are not all from the same family (meaning that their weights or shades of color are all different – the shades aspect will play factor later).

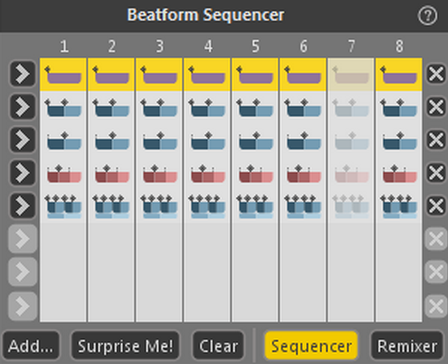
Notice that the very first bar has a darker yellow border. This is the Focus Region. The Focus Region is important, because the BeatForm Sequencer will arrange its BeatForm selections and active columns around the Focus region only. If you click any BeatForm in the Sequencer without holding any modifiers key, it will transport an identical change to all selection regions (making them all duplicates of the Focus region with the change you made).

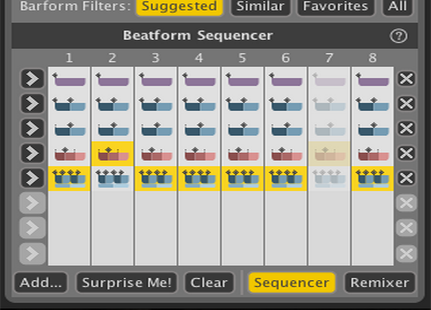
Now lets get to the fun part. In the beatform sequencer, hold shift modifier key and click on one of the arrows on the left hand side. Lets click on the red-shaded triplet lane.

If we Shift Click some other arrows you will see similar results. Notice the distribution of the beatforms is similar to the previous deployment.

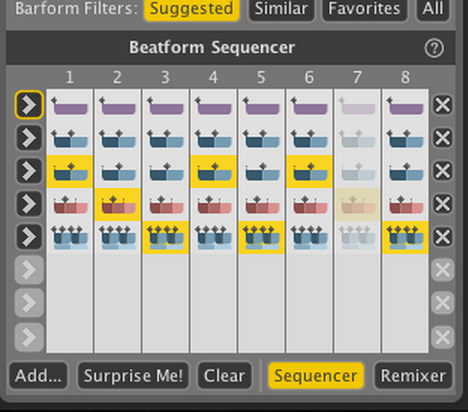
Now lets do something a little different. Instead of shift clicking the arrow, lets shift click some of the BeatForms themselves inside the BeatForm sequencer lanes

Now that has some different results. Looks like we have changed the BeatForm clusters and how they have been distributed. So whats happening here is the various BeatForms have been distributed across the BarForms based on their weights (strong=darkly shaded red or blue). Shift clicking on a BeatForm will deploy that BeatForm on all locations of the same shade or weight. So in simple terms we are micro selecting bits of beats and color swapping them according to their shades. Neat eh?
So by Shift clicking the arrow key the beatform is evenly distributed across the barforms. And when we only Shift click individual beatforms in the sequencer the general pattern of the distributed beatforms is modeled in each barform.

So the moral of the story? Just shift click all over the place and find happy accidents, while wearing earplugs so your brains don’t fall out of your ears when this blows your mind!


Comments are closed